The internal fuses in your Hi-Fi or Home Cinema components are often easy to change and it's a very worthwhile - and inexpensive - upgrade if you do.
"I am suprised at the extra detail and tighter bass compared with the original fuse. The sound is altogether 'cleaner' and sweeter than the original fuse. A very effective and reasonably priced upgrade." Online customer review
Assessing which fuse you need
The first thing is to check the value of the fuse you need. Be aware that there are two types of internal fuses: Slow Blow and Fast Blow.
The value of the fuse will be stamped on it; you may need a magnifier to see it. Slow blow fuses will be prefixed with a T (for 'Time Delay') e.g. T 3.15A denotes a 3.15A slow blow fuse.
Often, the only way to find the required information will be to take out the original fuse and examine the metal end cap where the fuse's specification will be stamped.

The information is often very small and difficult to read; the use of a magnifying glass will help. Some people use the camera on a smartphone to either take a picture and then zoom in, or digitally zoom in while you’re holding the phone.
IMPORTANT: Only replace fuses on a 'like for like' basis. If your equipment is fitted with a 2A fuse, you must replace it with a 2A fuse. Fitting a fuse of higher or lower value may cause inferior sound quality or present a safety issue.
Internal fuses are found in three places...
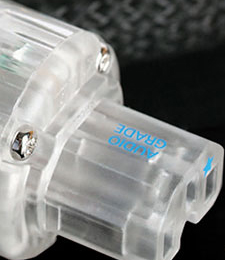
1. The first is inside the IEC socket and is accessible from the outside of the equipment.
First, remove the mains cable and disconnect the component from the mains supply. You will see the fuse holder underneath or to the side of the IEC socket. A small screwdriver is quite useful to pop out the holder so you can replace the fuse.

Pull out the existing fuse and replace it with the SuperFuse (2) and then reinsert the holder back into the unit.

2. The second place is a fuse holder mounted on the back panel. Again a small screwdriver is often useful to unscrew the holder. Please make sure the equipment is disconnected from the mains.

Once the holder is loosened, it will give you access to the fuse. Remove the fuse, replace with a SuperFuse and insert the holder back into the component.

3. The last area is inside the equipment which will involve taking off the lid. Before doing so remember to disconnect your component from the mains supply.
Use an appropriate screwdriver to remove the screws holding the case to the chassis. Depending on the make and model, the lid will either lift or slide off.
The fuse is usually mounted before the transformer and usually mounted on the circuit board near the back of the IEC socket, as in our example.

Simply remove the fuse from its holder, replace with your SuperFuse (2) and re-attach the lid.

Click here to buy internal SuperFuses


